

If you are migrating a site from an existing provider that doesn't utilise cPanel, this guide will make it simple and easy for you to make the switch. Follow the steps carefully for a successful migration.
If you are migrating a site from an existing provider that does use cPanel, click here
Before You Begin
Before you begin the migration steps, ensure that you have created a full backup of your website's databases and files and it is up to date. These backups are crucial components of the migration steps.
Step 1: Backing up your website files
The first step to migrating your site is to create a full backup of your site and downloading it to your local computer. Most hosting providers offer a way to back up your website's files. This often results in a zip, tar, tar.gz, or tgz file that you can download. If your hosting provider doesn't offer such tools, you can connect to your webspace using an FTP application and download the entire directory to your local computer.
Step 2: Backing up your database/s
Most websites require a database to function, whether you know you have on or not and its crucial ensure you've got backups for each one. Most hosting providers offer a popular web-based SQL management tool called phpMyAdmin. to download your database from phpMy Admin, follow these steps:
1. In your control panel, locate phpMyAdmin in the controls or by searching for the tool
2. Once you have loaded phpMyAdmin, click the database you are going to export from the left hand column
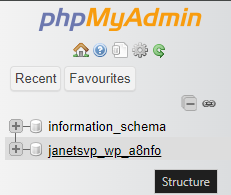
3. Once you have selected the database, click Export from the top toolbar.
4. On the export screen, select Quick export method and SQL format. Then click Export
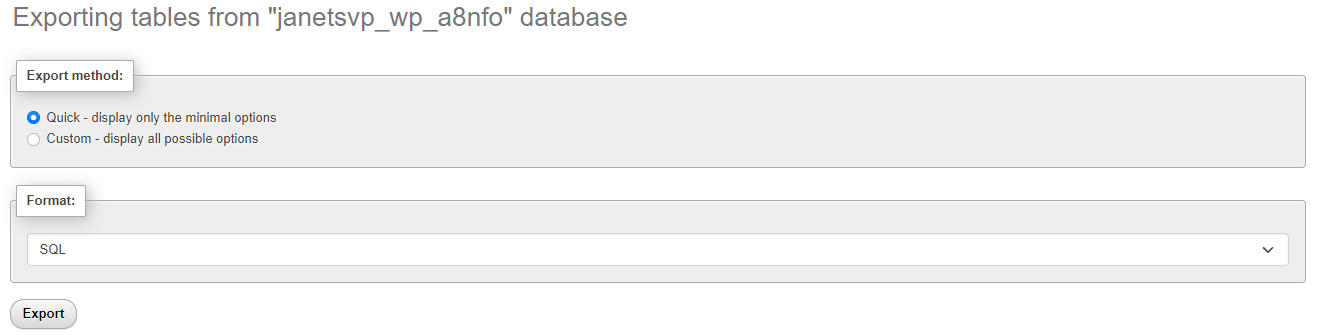
5. Once you have clicked Export a download will begin.
Step 3: Uploading your website files to Enviroweb
Once you have downloaded your most recent backups of your website files and database, you can upload them to Enviroweb. You can use the file upload function in the File Manager facility built into your cPanel account if your file backup archive is less than 250Mb. For larger archives, you'll need to use FTP software to connect to your new Brixly hosting and upload the archive file.
Step 4: Extracting your website files
Once your website files have been uploaded, you need to extract them using the File Manager in your cPanel account. After the files have been unpacked, you need to move them into your public_html directory or the physical root of your addon domain if you are restoring an addon domain.
Step 5: Importing your database/s
1. To import your database/s, open phpMyAdmin from your Enviroweb cPanel account and click Import.
2. Click Choose File in the File to import section and select your database file that you downloaded to your computer earlier.
3. Once uploaded, click Import at the bottom of the page to start the import process.
Step 6: Adjust your web application's configuration files
Most websites that use a database have a special configuration file that stores the details of the database server location, database name, and username. It is likely you will have changed the database name and/or database username once you have restored your database into your cPanel account. Therefore, it is usually necessary to update the configuration of your web applications to connect to the database under its new name, and perhaps via a new username/password. If you are unsure of the configuration changes required for a web application that you use, please consult the documentation from the provider for that application.
If you encounter any issues during your migration or require assistance, please contact our Technical Support department