

cPanel provides a built-in File Manager that allows you to manage your website files directly through your browser, without needing to install or use an FTP client. This guide will show you how to upload files using File Manager.
Step 1: Log in to your cPanel account
Access your cPanel account using your login credentials.
Step 2: Open File Manager
In the Files section of the cPanel homepage, click on File Manager.

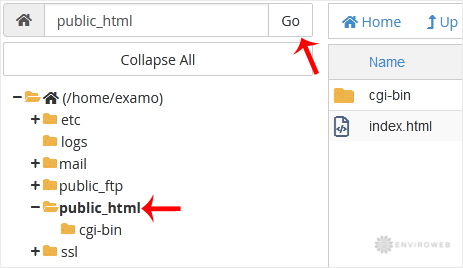
Step 3: Navigate to the desired directory
Inside File Manager, use the directory list on the left-hand side to locate where you want to upload your files. For website content, the public_html directory is the most common location.
Step 4: Click Upload
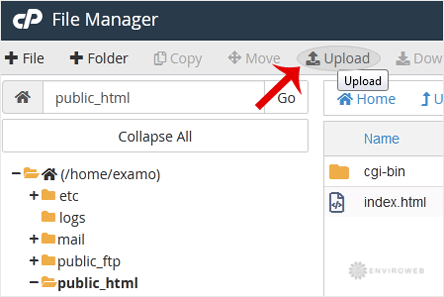
With the correct directory selected, click the Upload button in the top menu bar.
Step 5: Select and upload your file(s)
Click on Select File to choose the file from your computer, or simply drag and drop your file into the upload window. The upload will begin automatically.
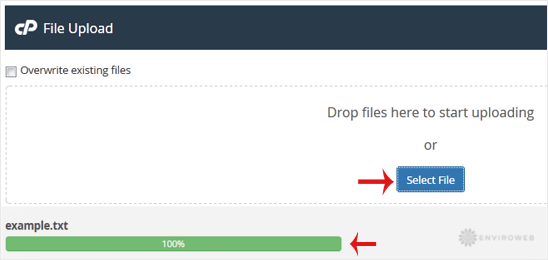
Once the upload is complete, your file will appear in the selected directory, ready to use on your website.
Note: If you are uploading a folder, it must first be compressed into a .zip file. Once uploaded, you can extract the folder using File Manager's built-in "Extract" option.