

The .htaccess file is a powerful configuration file used to control website behaviour such as redirects, security rules, and custom error pages. This guide will walk you through locating and editing your .htaccess file directly from cPanel using the File Manager tool.
Be cautious when modifying .htaccess as incorrect changes can impact your website's functionality.
Step 1: Log in to your cPanel account
Access your cPanel account using your hosting credentials.
Step 2: Open File Manager
From the Files section of the cPanel dashboard, click on File Manager.

Step 3: Navigate to the .htaccess location
Use the left-hand sidebar in File Manager to navigate to the appropriate directory. To edit the main .htaccess file for your website, go to the public_html folder.
Step 4: Enable viewing of hidden files (dotfiles)
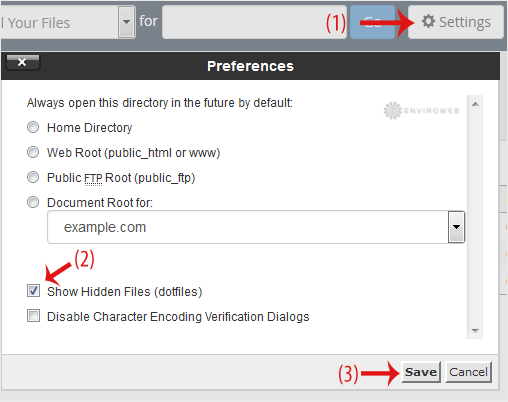
If you don’t see the .htaccess file, click on Settings in the top-right corner of the File Manager. In the settings popup, check the option for Show Hidden Files (dotfiles) and click Save. The .htaccess file should now appear. If it still doesn’t exist, you can create a new file named .htaccess.
Step 5: Edit the .htaccess file
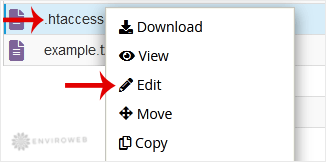
Right-click on the .htaccess file and select Edit from the context menu.
Step 6: Confirm editor launch
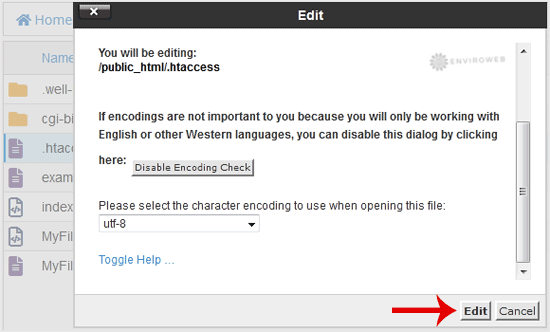
A confirmation window will appear. Click Edit to open the file in the code editor.
Step 7: Make and save your changes
Apply the desired changes to the file and click Save Changes in the top-right corner.
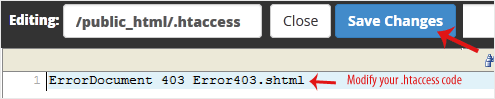
Once saved, your updates will be live immediately.