

MX (Mail Exchanger) records are DNS entries that determine where emails sent to your domain should be delivered. They define which mail servers are responsible for receiving incoming messages. This is an essential configuration step when setting up email for your domain. In this guide, we’ll walk you through how to add an MX Record using cPanel's Zone Editor.
Note: DNS changes, including MX records, can take between 12 to 24 hours to fully propagate across the internet. During this time, email delivery may be inconsistent.
Step 1: Log in to your cPanel account.
Step 2: In the Domains section, click on Zone Editor.
Step 3: Find your domain in the list and click on +MX Record under the Actions column.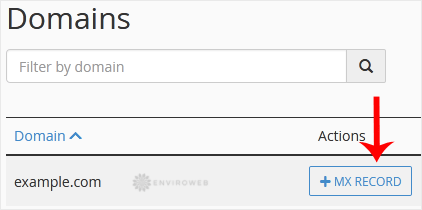
Step 4: In the popup that appears, enter the following details:
- Priority: Set the priority level of this mail server. Lower numbers mean higher priority. Typically, set your primary mail server to
0and backups to10or higher. - Destination: Enter the domain name of your mail server. This could be an external provider (like
mail.examplemail.com) or your own domain.
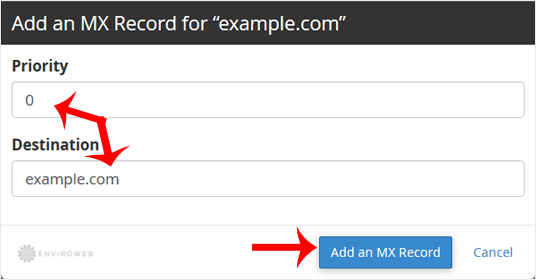
Step 5: Click Add an MX Record to save your changes.
Once saved, your new MX Record will route mail traffic according to your settings. Be sure to test email delivery after the DNS propagation window has passed.