

Forms enable your site visitors to interact with your website and submit information and contact you.
The Editor offers you a variety of powerful pre-built sections. With the form sections, you can add a fully functioning contact form within seconds. Additional form elements allow you to adjust these pre-built forms according to individual requirements. "Captcha" elements are also part of every form preset and ensure that the form is filled in by a human and not by a computer to reduce spam and bots.
By default, the form entries are sent to the customer's default email address defined in the Contact Data of the website. You can specify a recipient address in the form settings in the "Recipient" field. You can also add multiple recipients using this format: [email protected]; [email protected]; [email protected].
To add forms to your site, follow these steps:
1. Select Forms from the bottom of the left hand navigation menu
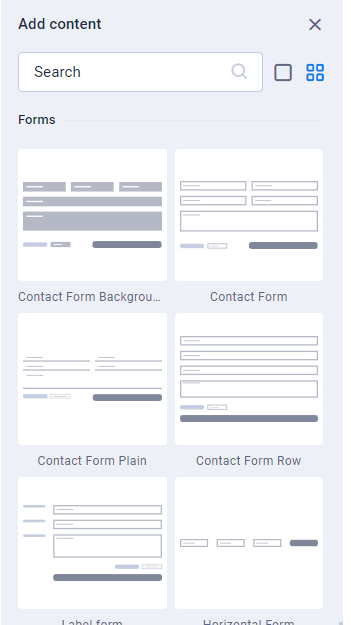
2. From here you will have multiple pre-made forms that can be applied to your site.
3. Once you have added the form to the page, you can modify the form settings in the left hand panel.
The "Redirect" and "Webhook" fields play a role after a form is submitted: In the Redirect field, you enter the URL or slug of the subpage to which you want to forward the website visitors after successfully submitting their entries. These are usually Thank you pages that reassure the user that the form has been submitted successfully.
In addition, the input can be forwarded to external tools such as CRM systems via a webhook URL as soon as a website visitor submits the form.
You can also create your own forms by manually adding elements such as Text input, email box, phone number box, radio buttons etc.